IMPORT CSV
FILE
Composer Catalog allows you to import tracks\two ways.
The first technique is importing from a CSV file (comma-separated values). It is very
important to note that the .csv file must conform to certain
formatting.
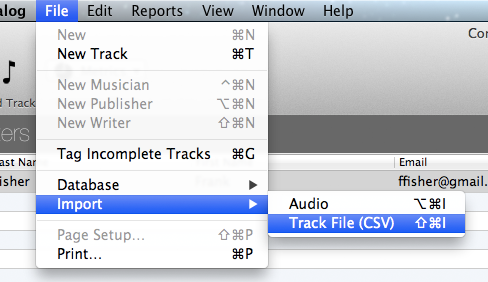
To import a
Microsoft Excel spreadsheet, go to FILE >>
IMPORT >> TRACK FILE
(CSV)
|
Then you
will see a screen that asks you for the directory that contains the .csv file.
Navidate to the csv directory. Once you select the folder, you will then see a
list of any .csv files that are in that directory. Find the one you want to
import and click on it.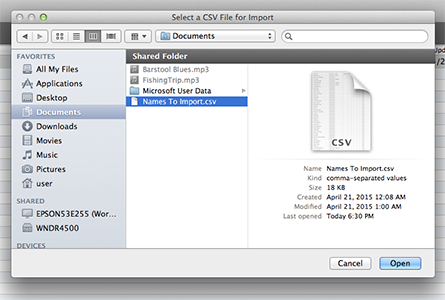
IMPORTANT:
In order for the
.csv file to import, it must be in a certain format. If you are not sure about
the format, take a moment and look at the template .csv file provided (see the
file location on the import screen)
The CSV file MUST have these
fields. If not, your file will not be able to import correctly.
Track
Title - this would be the title of your track
Track Type - must be i or n
(instrumental or
song)
Genre - example values: Blues, Rock, Country,
etc..
Registered - must be a y or n
Is
Signed - must be a y or
n
Key of
Track - example values: C. Dmin,
Emaj
Track Length - must be in MM:SS. M:SS, or :SS format
BPM - must
be a number (ex: 132)
PRO ID - must be a number
PRO Date - must be in
MM/DD/YYYY format
Composer Catalog will let you know if you are trying to
import genres that do not exist. You will then have the option of having the
system create them for you.
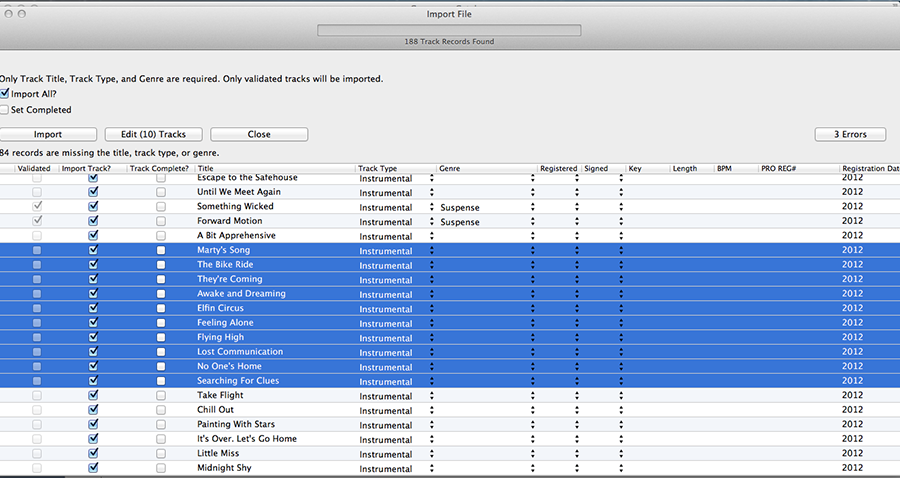
After you select your .csv file and the format is good, the
next screen will display the data. (see image below ). At the minimum, you will need to
have track title, track type, and genre filled in before you can import any
tracks.
the IMPORT ALL check box allows you to
select/deselect all the tracks for import.
the SET
COMPLETED checkbox lets the system know that you have all the
information that you need for the tracks you are importing. If you are going to
come back at some point to fill in the rest of the data, we highly suggest you
make sure that the Track Complete checkbox is NOT checked. These tracks will be
flagged and you will be able to get to them through the TAG INCOMPLETE
TRACKS section.
The
VALIDATED checkbox tells the user that all
the required fields are filled in correctly.
You
can do a mass update by highlighting multiple tracks and clicking the
EDIT TRACKS button (it will have the number of tracks you have
highlighted in it. Int he image below, there are 10 tracks highlighted, so the
button says "EDIT (10) TRACKS
".
 |
If you click the EDIT TRACKS
button and you have some tracks selected, this window will appear (see image
below). After you add whatever data you want applied, click the OK
button.
Once you have successfully loaded up the .csv and made any necessary edits, you can now click the Import button. If the import button is disabled, it means that your data is not formatted correctly or you do not have all three required fields filled in.